Easy Self-Watering Planters
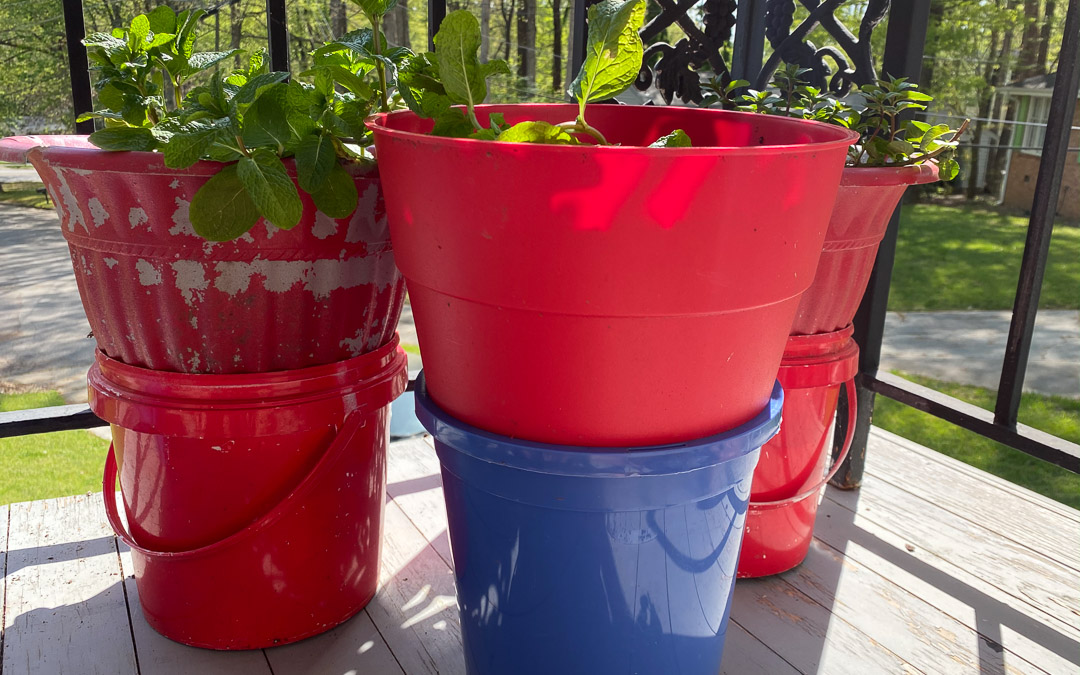
I love my container gardens of herbs and greens on my balcony and back patio, but I don’t like hauling buckets of water daily to water my plants. Over the years, I’ve experimented by making different types of self-watering planters, and I’ve come up with one that works well for me. You don’t need any special materials, and young children can help assemble the planters and take care of the plants.

The lessons we can all learn from growing plants are endless, but there are a few to focus on with early learners. If you are planting seeds, ask your children to make predictions on how many days it will take the seed to sprout. Write it on a calendar and mark off the days. Plant more seeds than you think will fit in the container. As the seeds sprout and grow, you can have the children gently pull out the extra plants to examine the parts of a plant.
If you are transplanting small plants, talk about the parts of a plant. Show your children the stem, the leaves, and especially the roots. Tell them how the roots will soak up the water to feed the plant and show them that the roots need to go into the soil. I can’t tell you how many children I’ve taught over the years who will either lay a plant on top of the soil or try to put it in the soil upside down. It’s all a wonderful learning process?
Children love watching things grow and find great satisfaction in growing food. Some herbs, such as mint and basil are easy to grow and will last through the hottest summers as long as they receive enough sunlight and water. While I can’t help you find a sunny spot in your yard, I can show you how to make an easy self-watering planter.
What You’ll Need:
- Plastic Planter with drainage holes in the bottom. I used plastic pots with saucers attached and pried off the saucers.
- Cotton rope to wick the water. I used a cotton clothesline. If you don’t have a cotton rope, you can substitute 1-inch wide strips of cotton
t-shirt fabric. - Plastic Bucket: Set the planter onto the bucket and check to see that the bottom reaches no more than halfway down the bucket.
- Potting Soil
- Herb seedlings or seeds
What You’ll Do:


If there’s a saucer attached to the bottom of the planter, pry it off with a screwdriver and set aside. You don’t need the saucer.


Cut an 18-inch (45 cm) piece of rope and thread it through one of the drainage holes. Pull it through so half is in the planter and half is hanging out of the bottom of the planter. The bottom half of the rope will hang into the bucket to wick the water into the planter.

Hold the rope upright as you pour potting soil into the planter. Tuck the end back into the soil.


Plant the seedlings or seeds.
Water the soil until water comes out of the drainage holes. Then, fill the reservoir bucket halfway full of water and place the planter onto the bucket. Check to be sure that the rope is in the water.
For the first few weeks, as the plants are getting established or the seeds are sprouting, water the soil directly. Check the bucket every few days to see if the water level is going down. If it is, you can stop watering the soil and just wait until the reservoir is almost empty. When it is, refill the bucket halfway. When your plants grow tall enough to harvest some leaves, let your child pinch or cut back the stems to encourage more growth.
Additional Note:


If your container does not fit snugly into the bucket, add a strip of fabric around the top of the bucket to seal it off from mosquitos and other pests. Mosquitos love to lay their eggs in standing water.

Enjoy container gardening with your child. Let me know how the self-watering planters work for you!


Hello world!